Monday Must (Have) See: Julie & Julia


I was all set to post about another kitchen gadget that I find very useful and then this afternoon I FINALLY went and saw the movie Julie & Julia. I realize that I'm far behind in going to see this movie and that I'm definitely not the first to blog about how great this movie was--and it really was GREAT! The kitchen gadget will be saved for another Monday, but I really feel like I need to express my thoughts and add to what so many others have already said.

I've never really considered myself to be defined by the term "foodie." I just really love learning about foods, the history, where it comes from, different varieties and more specifically anything to do with desserts. There is just something so invigorating about see a beautiful dessert that not only looks like art, but tastes even better than you could possibly imagine. This is why any worthwhile purchase of a cookbook or baking book usually has stunning photos that draws me in and then my imagination takes over and I dream about what flavors and textures will work together to create a delicious or rather a "Jillicious" dessert. But I've happily come to the realization that I am in this group of other like minded people called foodies.

Back to Julie & Julia.

I must admit that I don't own the famous cookbook by Julia Child - Mastering the Art of French Cooking. It's not that I don't think it would be an outstanding addition to my culinary library, it's just that over the last 4 to 5 years, I've been focused on dessert or baking books. But after seeing this movie and getting a glimpse into Julia Child's passion for French Cooking, I will be purchasing a copy to add to my cookbook collection.

The main reason why I LOVED this movie was the feeling I had while watching it. Seeing Julia Child decide to go to cooking school and loving every minute of it, brought back my own memories and how much I too, loved culinary school. I could relate to her competitive spirit--I'm sure most people in this industry can too. There is something within me that is completely motivated to push myself to do better, to create a dessert more delicious than the last and to be the best at what I do. And this is a daunting task, to say the least. There is a lifetime of learning to be had in any field, but especially in culinary pursuits.


I also related to the pure joy of sharing a well cooked meal with friends and family. When everyone comes together to savor a meal that was created with them in mind--is just a wonderful and satisfying feeling. It reminds me of one of my favorite food quotes that I have listed near the bottom of my blog page:

"The pleasant hours of our lives are all connected by a more or less tangible link, with some memory of the table." ~ by Charles Pierre Monselet

*All three above pictures are courtesy of Columbia Pictures.

There is just something completely magical about good food, family and friends and being together to enjoy a wonderful meal and creating memories. If you haven't seen this movie, for whatever your reasons--just go. Go and enjoy!

Homemade Tomato Sauce


It's finally here! This weekend is the kick-off for the Canning Across America Can-A-Rama, classes, canning groups and festivities around the country to celebrate the art of canning. I hope that you are getting inspired from all the lovely blogs that are posting great canning recipes and information.

Today is the final installment of this week long posting on canning, but don't worry, I will still continue to post about canning from time to time. In fact I already see a Dill Pickle recipe in the future, as I will be picking pickling pickles next week (try saying that three times fast!).


Tomato Sauce - Seasoned
From So Easy to Preserve, pg. 57

Yields = About 5 half-pint jars

10 pounds tomatoes, peeled, cored and chopped
3 medium onions, finely chopped
3 cloves garlic, minced
1 1/2 tsp. oregano
2 bay leaves
1 tsp. salt
1 tsp. black pepper
1/2 tsp. crushed red pepper
1 tsp. sugar

Hot Pack Method:

1) Place all ingredients in a large saucepan. Bring to a boil. Simmer 2 hours, stirring occasionally.

2) Press mixture through a food mill. *Let me introduce you to our "can't-do-without" piece of equipment, The Victorio Food Mill! We attach it to the extra large cutting board pull-out on our kitchen island.


We set it up with two bowls. The small one for catching the seeds and other discards.


And the large bowl will hold the yummy tomato goodness that is left over after pressing it through.


Here is what it looks like during this process:


Usually my job is to hold the smaller bowl to catch what we don't want in the sauce, while my Mom pours the tomato sauce through the top. It can be done with one person, but it's much easier with two.


This really presses all the tomatoes so well, that you will get every last drop of sauce.


By the end you'll have a beautiful, smooth tomato sauce.


3) Pour tomato sauce mixture back into the pot and cook until thick over medium-high heat, stirring frequently.


4) Add bottle lemon juice or citric acid to jars. Add 1 Tbsp. of bottled lemon juice or 1/4 tsp. citric acid per pint of tomatoes. *Since we were using half-pint jars, we adjusted the amounts accordingly.

This is a very important step! The reason why tomatoes need to be acidified, is explained in the So Easy to Preserve book (pg. 50):

"Because tomatoes have pH values that fall close to 4.6, you must take some precautions to can them safely. First, select only disease-free, preferably vine-ripened, firm fruit for canning. Do not can tomatoes from dead or frost-killed vines. (Green tomatoes are more acidic than ripened tomatoes and can be canned safely using any of the directions given for tomatoes in this book.)"

*Also, it is very important to use only bottled lemon juice instead of fresh squeezed lemon juice in this process. When using bottled lemon juice you know exactly the amount of acidity that will be in the measurements given in the recipe, whereas fresh squeezed lemons may vary.


The lemon juice can be added directly to each jar before filling it with the tomato sauce. If this makes the produce taste too acid, add a little sugar to offset the taste. *We added 1 tsp. of sugar to balance the taste and it worked great.


5) Pour hot sauce into hot jars, leaving 1/2-inch headspace. Wipe jar rims. Adjust lids and process. Tomato sauce may be processed either by the Boiling Water Bath method or the Pressure Canner method. *The day we made this, we did a triple batch of this recipe and since we have two stove tops and both canners, we used both methods.


Boiling Water Bath: Half-Pints or Pints = Process 35 minutes. Click here for Boiling Water Bath instructions.

Pressure Canner (Weighted Gauge at 10 pounds of pressure; remember this depends on your altitude): Half-Pints or Pints = Process 15 minutes. Click here for Pressure Canning directions.

6) After removing the jars from the canner, set them on a towel and leave undisturbed for 12 hours, before storing.

For
more information on safe canning practices, visit the National Center for Home Food Preservation website.

Now you will have delicious homemade tomato sauce to use for a variety of meals--so yummy and fresh--plus, you'll have the satisfaction of knowing exactly what went into making your sauce.

This is my last shout-out for the GIVEAWAY that started this canning week. All the recipes and instructions that I've shared have come from this AWESOME canning book, So Easy to Preserve. You have until Monday, August 31st at 8:00 PM (PST) to leave your comment and enter for a chance to win this book. Click here to take you to the giveaway page and when you do, be sure to scroll down to the end and leave your comment.

Good Luck & Happy Canning!

Oh the PRESSURE of what to do with all those beans in the garden?


Raise your hand if you have more beans in your garden and you don't know what to do with them all? It seems like every other day it's time to pick the beans again. Up until now all the canning posts have included the Boiling Water Bath method, but today I'm going to show/explain the Pressure Canning method. If you want to can those wonderful green beans, this post is for you!

Pressure canning is the ONLY SAFE METHOD of canning vegetables! I want to be clear on this, especially if this is your first time canning vegetables. It's a great method, but you do want to make sure you follow the directions carefully, to make sure that you are ensuring safe canning practices. If you are wondering why vegetables can't be canned using the Boiling Water Bath method, please continue reading. (I apologize for quoting so much in the next section, but it is such IMPORTANT information that I want to make sure it's completely correct.)

Here is a brief explanation from the book, So Easy to Preserve (pgs. 17 & 18) of how this method works:

"The canning process involves placing foods in jars or cans and heating them to a temperature that destroys microorganisms that could be a health hazard or cause the food to spoil. Canning also inactivates enzymes that could cause the food to spoil. Air is driven from the jar or can during heating and as it cools a vacuum seal is formed. This vacuum seal prevents air from getting back into the food."

"Clostridium botulinum bacteria are the main reason why low-acid food must be pressure canned to be safe. Clostridium botulinum is a common soil microorganism which produces a very deadly toxin or poison. This food poisoning is called botulism."

"The spores of Clostridium botulinum can be destroyed by canning the food at a temperature of 240 degrees F. or above for a specific period of time. Since this temperature is above the boiling point of water, it can only be reached in a pressure canner."

The main differences between most Pressure Canners is they will have a Dial Gauge or a Weighted Gauge. Click here to see more information about these. I used a Weighted Gauge Pressure Canner to can our beans and the directions will be tailored to this type of canner.


Pressure Canned Green Beans
From So Easy to Preserve, pg. 80

1) Select tender, crisp pods. Wash beans.


2) Trim both ends of the beans. *I'm going to show the process we do this and although you could snap the ends of by hand, I've found this works faster for me.

Line up a few beans and have them even on one end, like this:


Then cut the ends off:


Repeat on the other end of the beans:


This is the set-up I find helpful; I use three flexible cutting boards and the one in the middle is on top of the other two ends. As I cut the bean ends off, I can just slide them over with my knife to one side and then when it gets full, I can discard them into a bowl for compost later.


After cutting the beans into 1 to 2-inch pieces, I slide those onto the other cutting board and when that gets full, they go into a large bowl. Repeat until you've trimmed all your beans.


3) Once your beans are ready to be canned, make sure you have your bottles washed & hot ready for use. Also have a pot of boiling water ready to add the liquid to the beans after they are packed into the jars. This method is referred to as Raw Pack.

4) Add 1/2 tsp. salt to pint jars or 1 tsp. salt to quart jars (I used pint jars this time). Pack beans tightly into hot jars, leaving 1-inch headspace.


5) Fill jar to 1-inch from top with boiling water. Remove air bubbles. Wipe jar rims. Adjust lids and process.

6) Your pressure canner should have 2 to 3-inches of water almost to a boil, as you place your jars inside.

*Make sure your jars are not touching and that there is 2 to 3-inches of water after you put them all in--you may have to add more or take out some if too much.


7) Fasten the canner lid securely. Leave the weight off the vent port. Turn the heat to high and heat until the water boils and steam flows freely in a funnel-shape from the open vent port. While maintaining the high heat setting, let the steam flow (exhaust) continuously for 10 minutes. *When this process starts, it may start showing more steam, but don't start the 10 minutes until it's steadily steaming, as it shows in the picture below.

8) After this venting, or exhausting, of the canner, place the counterweight on the vent port. The amount of weight you use will depend on the altitude of where you are canning. We are at about 500 feet elevation, which means we use the 10 pound weight gauge. The canner will pressurize during the next 3 to 10 minutes. Start timing the process when the weighted gauge begins to jiggle or rock as the manufacturer describes.

IMPORTANT: If at any time pressure goes below the recommended amount (if the weight gauge stops moving), bring the canner back to pressure and begin the timing of the process over, from the beginning (using the total original process time). This is important for the safety of the food.

9) When the timed process is completed, turn off the heat, remove the canner from the heat if possible, and let the canner cool down naturally. While it is cooling, it is also de-pressurizing. Do not force cool the canner. Forced cooling may result in food spoilage. Also, DO NOT REMOVE THE WEIGHTED GAUGE YET! Removing the weight before it has de-pressurized, may result in the canner exploding and that could cause some serious burn injuries...or worse.

10) After the canner has cooled (this may take about 30-40 minutes on older canner models, like ours), tilt the weight slightly to make sure no steam escapes before pulling it all the way off. After removing the weight from the vent port, wait another 10 minutes before removing the lid. Remove lid carefully, and transfer jars to a towel on the counter and let them sit undisturbed for the next 12 to 24 hours.


See how delicious these look? They are going to taste so fresh and will be a great side dish for meals. For more information on safe canning practices, visit the National Center for Home Food Preservation website.

If this post has inspired you to do your own canning or want to learn more, don't forget to enter the giveaway here. Scroll down to the bottom and leave your comment for your chance to win this AWESOME canning book: So Easy to Preserve.

Happy Canning!

Daring Bakers: Dobos Torta


I am a quarter Hungarian. I love baking cakes. What do these seemingly random statements add up to? It means I was very excited to take on this month's Daring Bakers challenge.

The August 2009 Daring Bakers' challenge was hosted by Angela of A Spoonful of Sugar and Lorraine of Not Quite Nigella. They chose the spectacular Dobos Torte based on a recipe from Rick Rodgers' cookbook Kaffeehaus: ExquisiteDesserts from the Classic Caffés of Vienna, Budapest, and Prague.

As I was saying before, I was happy to see a cake for this challenge, especially one that I haven't made before. Even though I create cakes for a living, I never tire making them. Also, I was pleased to be making something that is part of my ancestry. I really don't know much about my Hungarian ancestors, but over the years, I've been doing some genealogy and this challenge was a little reminder to start that up again.


The Dobos Torta is a five-layer sponge cake, filled with a rich chocolate buttercream and topped with thin wedges of caramel. (You may come across recipes which have anywhere between six and 12 layers of cake; there are numerous family variations!) It was invented in 1885 by József C. Dobos, a Hungarian baker, and it rapidly became famous throughout Europe for both its extraordinary taste and its keeping properties. The recipe was a secret until Dobos retired in 1906 and gave the recipe to the Budapest Confectioners' and Gingerbread Makers' Chamber of Industry, providing that every member of the chamber can use it freely.


The Dobos Torta does take more time than your average cake, but overall, I found the directions very easy to follow and it was a relaxing couple of hours while getting into a good rhythm with the technique. Although, our hostesses said we could be create with the size and shape and some of the flavors, I decided to stay true to the classic design of this well known torte. I did make a caramel buttercream and alternated it with the chocolate buttercream & I slightly flavored the sponge layers with a caramel flavoring as well. I've added a few notes and comments in this color, so you can follow my journey.


Equipment

2 baking sheets
9” (23cm) springform tin and 8” cake tin, for templates
mixing bowls (1 medium, 1 large)
a sieve
a double boiler (a large saucepan plus a large heat-proof mixing bowl which fits snugly over the top of the pan)
a small saucepan
a whisk (you could use a balloon whisk for the entire cake, but an electric hand whisk or stand mixer will make life much easier)
metal offset spatula
sharp knife
a 7 1/2” cardboard cake round, or just build cake on the base of a springform tin.
piping bag and tip, optional

Prep times

Sponge layers 20 mins prep, 40 mins cooking total if baking each layer individually.
Buttercream: 20 mins cooking. Cooling time for buttercream: about 1 hour plus 10 minutes after this to beat and divide.
Caramel layer: 10-15 minutes.
Assembly of whole cake: 20 minutes


Sponge cake layers

6 large eggs, separated, at room temperature
1 1/3 cups (162g) confectioner's (icing) sugar, divided
1 teaspoon (5ml) vanilla extract
1 cup plus 2 tablespoons (112g) sifted cake flour (SUBSTITUTE 95g plain flour + 17g cornflour (cornstarch) sifted together)
pinch of salt

Directions for the sponge layers:

The sponge layers can be prepared in advance and stored interleaved with parchment and well-wrapped in the fridge overnight.

1.Position the racks in the top and centre thirds of the oven and heat to 400F (200C).

2.Cut six pieces of parchment paper to fit the baking sheets. Using the bottom of a 9" (23cm) springform tin as a template and a dark pencil or a pen, trace a circle on each of the papers, and turn them over (the circle should be visible from the other side, so that the graphite or ink doesn't touch the cake batter.)

3.Beat the egg yolks, 2/3 cup (81g) of the confectioner's (icing) sugar, and the vanilla in a medium bowl with a mixer on high speed until the mixture is thick, pale yellow and forms a thick ribbon when the beaters are lifted a few inches above the batter, about 3 minutes. (You can do this step with a balloon whisk if you don't have a mixer.)

4.In another bowl, using clean beaters, beat the egg whites until soft peaks form. Gradually beat in the remaining 2/3 cup (81g) of confectioner's (icing)sugar until the whites form stiff, shiny peaks. Using a large rubber spatula, stir about 1/4 of the beaten whites into the egg yolk mixture, then fold in the remainder, leaving a few wisps of white visible. Combine the flour and salt. Sift half the flour over the eggs, and fold in; repeat with the remaining flour. *I added some caramel flavoring, just a hint and it worked well with the chocolate and caramel buttercreams.

5.Line one of the baking sheets with a circle-marked paper. Using a small offset spatula, spread about 3/4cup of the batter in an even layer, filling in the traced circle on one baking sheet. Bake on the top rack for 5 minutes, until the cake springs back when pressed gently in the centre and the edges are lightly browned. While this cake bakes, repeat the process on the other baking sheet, placing it on the centre rack. When the first cake is done, move the second cake to the top rack. Invert the first cake onto a flat surface and carefully peel off the paper. Slide the cake layer back onto the paper and let stand until cool. Rinse the baking sheet under cold running water to cool, and dry it before lining with another parchment. Continue with the remaining papers and batter to make a total of six layers. Completely cool the layers. Using an 8" springform pan bottom or plate as a template, trim each cake layer into a neat round. (A small serrated knife is best for this task.) *I baked each torte layer separately, since it was only a 5 minute baking time. I didn't see any reason to keep opening the oven door that many times and letting the heat out. Also, I followed the circle on the parchment very close when I spread the batter and they turned out very circular and I didn't even need to trim them. When you frost the sides of the cake, it evens out the sides if they happen to not line up exactly.


Chocolate Buttercream

4 large eggs, at room temperature
1 cup (200g) caster (ultrafine or superfine white) sugar
4oz (110g) bakers chocolate or your favourite dark chocolate, finely chopped
2 sticks plus 2 tablespoons (250g) unsalted butter, at room temperature.

Directions for the chocolate buttercream:

This can be prepared in advance and kept chilled until required. *I made the chocolate buttercream first and by the time I had baked all the torte layers, it was ready to have the butter added and finished mixing.

1.Prepare a double-boiler: quarter-fill a large saucepan with water and bring it to a boil.

2.Meanwhile, whisk the eggs with the sugar until pale and thickened, about five minutes. You can use a balloon whisk or electric hand mixer for this. *Using a hand whisk works fine--I didn't need to use an electric mixer for this step.

3.Fit bowl over the boiling water in the saucepan (water should not touch bowl) and lower the heat to a brisk simmer. Cook the egg mixture, whisking constantly, for 2-3 minutes until you see it starting to thicken a bit. Whisk in the finely chopped chocolate and cook, stirring, for a further 2-3 minutes.

4.Scrape the chocolate mixture into a medium bowl and leave to cool to room temperature. It should be quite thick and sticky in consistency.

5.When cool, beat in the soft butter, a small piece (about 2 tablespoons/30g) at a time. An electric hand mixer is great here, but it is possible to beat the butter in with a spatula if it is soft enough. You should end up with a thick, velvety chocolate buttercream. Chill while you make the caramel topping. *I transferred the buttercream mixture to my Kitchen Aid mixer and used the whisk attachment. I added the soft butter while it was on high speed (in small amounts) and it came out perfectly. The key is to make sure it gets whipped long enough and is chilled after mixing.


Caramel topping

1 cup (200g) caster (superfine or ultrafine white) sugar
12 tablespoons (180 ml) water
8 teaspoons (40 ml) lemon juice
1 tablespoon neutral oil (e.g. grapeseed, rice bran, sunflower)

Finishing touches

a 7” cardboard round
12 whole hazelnuts, peeled and toasted
½ cup (50g) peeled and finely chopped hazelnuts

Directions for the caramel topping:

1.Choose the best-looking cake layer for the caramel top. To make the caramel topping: Line a jellyroll pan with parchment paper and butter the paper. Place the reserved cake layer on the paper. Score the cake into 12 equal wedges. Lightly oil a thin, sharp knife and an offset metal spatula.

2.Stir the sugar, water and lemon juice in a small saucepan. Bring to a boil over a medium heat, stirring often to dissolve the sugar. Once dissolved into a smooth syrup, turn the heat up to high and boil without stirring, swirling the pan by the handle occasionally and washing down any sugar crystals on the sides of the pan with a wet brush until the syrup has turned into an amber-coloured caramel.

3.The top layer is perhaps the hardest part of the whole cake so make sure you have a oiled, hot offset spatula ready. I also find it helps if the cake layer hasn't just been taken out of the refrigerator. I made mine ahead of time and the cake layer was cold and the toffee set very, very quickly—too quickly for me to spread it. Immediately pour all of the hot caramel over the cake layer. You will have some leftover most probably but more is better than less and you can always make nice toffee pattern using the extra to decorate. Using the offset spatula, quickly spread the caramel evenly to the edge of the cake layer. Let cool until beginning to set, about 30 seconds. Using the tip of the hot oiled knife (keep re-oiling this with a pastry brush between cutting), cut through the scored marks to divide the caramel layer into 12 equal wedges. Cool another minute or so, then use the edge of the knife to completely cut and separate the wedges using one firm slice movement (rather than rocking back and forth which may produce toffee strands). Cool completely.

Assembling the Dobos

1.Divide the buttercream into six equal parts.

2.Place a dab of chocolate buttercream on the middle of a 7 1/2” cardboard round and top with one cake layer. Spread the layer with one part of the chocolate icing. Repeat with 4 more cake layers. Spread the remaining icing on the sides of the cake. *I had some extra Vanilla Swiss Buttercream Icing leftover from another cake & I added some caramel flavor and alternated it in between the layers in addition to the chocolate buttercream.

3.Optional: press the finely chopped hazelnuts onto the sides of the cake. *I toasted them first, then chopped them. They had a nice nutty flavor.

4.Propping a hazelnut under each wedge so that it sits at an angle, arrange the wedges on top of the cake in a spoke pattern. If you have any leftover buttercream, you can pipe rosettes under each hazelnut or a large rosette in the centre of the cake. Refrigerate the cake under a cake dome until the icing is set, about 2 hours. Let slices come to room temperature for the best possible flavour. *Personally, I thought the cake was better slightly chilled, rather than at room temperature, but either way it was still delicious.

72 lbs. of Peaches


A couple of weeks ago, my Mom and I went to pick up some local peaches for canning. When we got there we found it was cheaper to just pick them ourselves and since we had the time, we did just that. We left with three boxes that weighed in at 72 lbs. We really didn't think there was that many and wondered if we should have picked more.

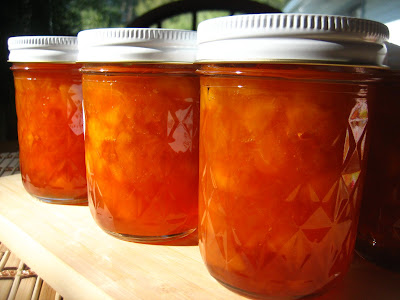
Several hours later, we both realized that we had A LOT of peaches to put up. We first went through and selected the very best & ripe ones for canning bottled peaches. We put up 14 quarts of those. Then I made some spiced peach preserves and that made 19 half-pints. A couple of days later I made some peach citrus preserves and that made another 14 half-pints. The few we had left were used on ice cream, morning oatmeal and for snacks.

After all this, we both decided that next year that 40 lbs. would be plenty! Although it was a long few days of canning, it's always so worth it in the end--we have some wonderful jars of sweet, peach treats that will be so yummy in the winter when fresh peaches aren't really available here.

According to my new favorite canning book, So Easy to Preserve, the difference between jams and preserves
is this:

"Jams are made by cooking crushed or chopped fruits with sugar. They are thick, sweet spreads that tend to hold their shape but are less firm than jelly. The shape of fruit pieces are not retained when making jam."

"Preserves are small, whole fruits or uniformly sized pieces in a thick slightly gelled sugar syrup. The fruit should be tender and plump and there should be no mushy or broken up fruit tissue."


I call both recipes a form of peach preserves. The spiced peach preserve is really more of a cross between a jam and a preserve and the peach citrus preserve is definitely more of a preserve than a jam (if you want to be technical about it).


Spiced Peach Preserves
Adapted from So Easy to Preserve, pg. 210

Yields = 19 half-pint jars

20 cups peaches
10 cups sugar
1 vanilla bean
1 tsp. ground ginger
1/2 tsp. cloves
1 1/2 tsp. cinnamon
1/4 tsp. cardamon
3 Tbsp. lemon juice
1 lemon, zested

1) Sterilize canning jars. Combine peaches, sugar, spices and lemon juice & zest and slowly bring to boiling (I cook it on low for at least 30 minutes, so the flavors have a chance to infuse with the peaches), stirring occasionally.

2) Cook rapidly until thick, about 15 to 25 minutes (this was a very large batch, so it took a bit longer--if you cut this recipe in half, it won't take as long), stir frequently to prevent sticking.

3) Pour hot jams/preserves into hot jars, leaving 1/4-inch headspace. Wipe jar rims and adjust lids. Process 5 minutes in a Boiling Water Bath.

4) Allow jars to sit undisturbed for at least 12 hours before moving them.


*This recipe for spiced peach preserves is on the stronger side, so if you don't want it as pronounced, then use smaller amounts. Also, this is wonderful on grilled chicken!


Peach Citrus Preserves
Adapted from So Easy to Preserve, pg. 210

Yields = 14 half-pint jars

14 cups peaches, cut in large pieces
8 cups sugar
1 large orange, zested & juiced
2 lemons, zested & juiced

1) Sterilize canning jars. Combine peaches, sugar, orange & lemon juices and zests. Cook on low for 45 minutes, till some of the water content is cooked down.

2) Remove peach pieces from syrup using a strainer and set aside in large bowl. Bring peach syrup to 222 degrees f. (use a candy thermometer to monitor heat). Stir frequently & watch carefully (do not leave your kitchen, especially during this step).

3) Once syrup has reached 222 degrees f., remove pan from heat and add peach pieces back into syrup. Put back on medium heat and cook about 5 more minutes, to bring mixture back to even heat and it should thicken a little more.

4) Pour hot jams/preserves into hot jars, leaving 1/4-inch headspace. Wipe jar rims and adjust lids. Process 5 minutes in a Boiling Water Bath.

5) Allow jars to sit undisturbed for at least 12 hours before moving them.


*If you don't want to spend as much time cooking down the fruit, you can use pectin and follow the directions given with the package. I didn't have enough pectin at the time, so this was a great way to cook the preserves to be thick enough and still keep the peach pieces intact. I love having larger pieces in my jams/preserves, but you can cut them any size you prefer. These peach citrus preserves are really delicious as an ice cream topping, tart filling, or on toast.

Lemon Cucumber Pickles - Part 2


A few weeks ago I wrote this post on making Lemon Cucumber pickles. Since then, I've had several requests for a good canning recipe to use the bounty of lemon cucumbers that people have coming from their gardens. The main difference between this recipe and the one I gave on the first lemon cucumber post is this one will follow a specific recipe, to ensure safe canning methods. The previous one was a non-canning recipe, more for just enjoying the first cucumbers of the season; easy and delicious to eat right away with your summer meals. Although I didn't add spices to that first recipe, you can add your favorite spices to taste.

This recipe is a delicious bread-and-butter pickle recipe and using the lemon cucumbers work great, because they are firm enough (the key is to pick them and use them immediately, don't wait several days, as they will start to get softer and not be as firm when made into pickles) and have a nice sweet (non-bitter) taste.

I picked our cucumbers and within the hour began the pickle making process. There are two types of cucumbers pictured below; the long, green ones are Armenian Cucumbers and the smaller, round, yellowish ones are the Lemon Cucumbers.

The following is a "fresh pack or quick process pickle" recipe, meaning the pickles are covered with boiling hot vinegar, spices and seasonings. I am including extra notes in this post, if you are canning for the first time or if it's been awhile since you last canned. Please click on the links for more specific and helpful information. For any other canning questions always check this website for up-to-date and accurate information.

Bread-and-Butter Pickle Slices
From So Easy to Preserve, pgs. 125-126


Yields = 7-8 pints

6 pounds of 4 to 5-inch pickling cucumbers *I used mostly lemon cucumbers and one large Armenian cucumber.
8 cups thinly sliced onions /about 3 pounds *I used a mixture of walla walla onions and yellow onions
1/2 cup canning salt *It's very important to use "canning" or "pickling" salt, rather than table salt. Other salts contain anti-caking materials and this can make the brine or liquid cloudy.
Crushed or cubed ice
4 cups vinegar (5%) *Use vinegar of 5-percent acidity. Do not use homemade vinegar or vinegar that you don't know the acidity of in pickling. Also, do not dilute the vinegar, because you will be diluting the preservative effect.
4 1/2 cups sugar
2 Tbsp. mustard seed
1 1/2 Tbsp. celery seed
1 Tbsp. ground turmeric

Preparation:

1) Wash cucumbers. Cut 1/6-inch off blossom end and discard. Cut into 3/16-inch rings.


2) Combine cucumbers and onions in a large bowl. Add canning salt.

3) Cover with 2 inches crushed or cubed ice. Refrigerate 3 to 4 hours, adding more ice as needed.

To Make Pickles:

1) Add sugar and remaining ingredients to vinegar in a large pot. Boil 10 minutes.

2) Add well drained cucumbers and onions and slowly reheat to boiling.

3) Fill pint or quart jars with cucumber & onion slices, leaving 1/2-inch headspace. Fill to 1/2 inch from top with hot cooking liquid. Remove air bubbles. Wipe jar rims. Adjust lids.

4) Process pints or quarts for 10 minutes in a Boiling Water Bath. After processing and cooling, jars should be stored 4 to 5 weeks before use to develop ideal flavor.

*Remember after removing jars from Boiling Water Bath, they should remain undisturbed for 12 hours before moving them to storage.

Just look at all the spices mixed with the onions and pickles--if you let them sit 4 to 5 weeks as suggested by the recipe to fully develop the flavor, it will be so worth the wait!


Remember to enter the giveaway for this AWESOME canning book--So Easy to Preserve!
(Just scroll down to the bottom of this post to leave a comment and enter to win this AWESOME book.)